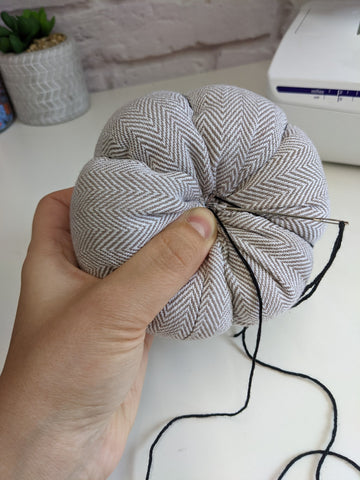
We're making pumpkins!
It's officially Autumn so we thought we'd share this fun pumpkin project with you all! They're an easy make, and great centre pieces for the table and are the perfect project for using up those scrap fabrics.

You will need:
Main fabric
Embroidery thread
Long doll needle
Stuffing
A stick
Take one rectangular piece of fabric and fold so the right sides facing are together. Line up the short raw edges sew to make a tube. Ensure to do a lock-in stitch at the beginning and end of your sewing.

Press seam open.

Hand stitch a line of taking stitches around the bottom raw edge. Approx 1cm from the raw edge. Pull in to gather the fabric. Stitch closed with a knot.


Turn so right sides are facing out and fill with stuffing. Fill with as much as stuffing as possible at this point.

Repeat step 3 with the top raw edge. Please note you may find it useful to use your embroidery thread for this step, as pulling the fabric in with the stuffing inside can cause regular thread to break.


Take a long length of your embroidery thread and long doll needle, make a few stitches to anchor your thread at the bottom of your pumpkin. Then, push the needle and thread through to the top of pumpkin, pull tight to create a crease. Continue doing this around your pumpkin as in the following photos. Making approx 5 or 6 creases per pumpkin.


Finish off your stitching by pulling tight and creating a knot at the bottom of your pumpkin.

Now it’s time to find a small stick and pop into the top of your pumpkin and you are finished! Hope you get to make many more!

Find the FREE sewing pattern to download here - https://www.owlandsewingcat.com/products/free-pumpkins-pattern-and-instructions
