
How to understitch
How to understitch
For this blog post we'll be showing you how to understitch. This handy technique keeps the facing to the inside of the garment without seeing the stitching on the outside!
We use this technique when making our Ava Tunic.

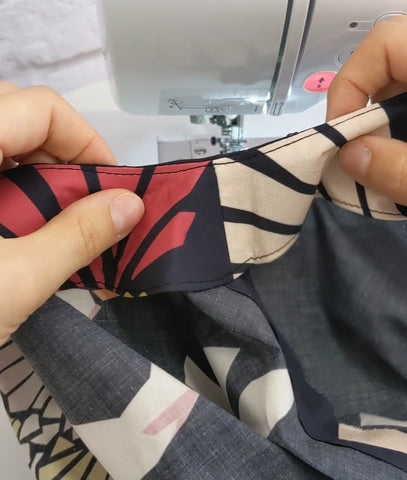
Start by pressing your seam where your facing and main garment meets. Ensuring the seam allowance is pressed towards your facing. If you are understitching around a curve, now is the time to clip your curves.

It's time to sew! Stitch on top of your facing, close to the seam. Ensure your seam allowance underneath is facing onto the facing side and stitch approx 1/4" from the seam and onto the facing. This will therefore hold the seam allowance onto the facing and allow it to roll back and hold in place when worn.


Hold the fabric taught as you go so there are no puckers. If you approach a corner, it can be tricky to understitch in a tight spot, only go as far as your machine will allow.

When you have finished stitching, lay your facing into position onto the inside of your garment and press. Your stitching will be on the inside and will hold your facing in position.
Tah Dah! You have completed your understitching, your facing is now sat inside your garment with a neat, finished edge!

Find our Ava Tunic pattern here - https://www.owlandsewingcat.com/products/ava-tunic-pattern-sizes-10-28