
How to do shirring!
For this blog post we're giving you a step by step guide to shirring.
This is a technique that involves sewing rows of stitching with an elastic thread to create a decorative effect. Shirring can be used when dressmaking. As shown below on our summer dress, pattern available here.

What you'll need -
Fabric (ideally light weight cotton for your first try!)
Shirring elastic
Sewing Thread
Iron with steam
Step 1 - thread your bobbin with the shirring elastic. We do this by hand winding the elastic onto the bobbin. It can help to thread the elastic through the hole in the bobbin at the start of your winding, this can be held in place as you start to wind. Make sure to pull fairly tight as you go as this will help create your gathered stitches later on.


Step 2 - thread up your machine. Pop the shirring elastic into the bobbin case at the bottom of the machine as normal. Use a regular thread on the top of your machine.
Step 3 - lengthen your stitch length to around a 3.5-4mm (this may need adjusting as you start sewing and dependent on fabric choice.) The thread tension shouldn't need adjusting but you can however make this slightly tighter if needed.

Step 4 - before you begin sewing, pull up the elastic through the plate of the sewing machine. Do this by hand turning the fly wheel and pulling up the thread so you have your bobbin elastic and top thread in your hand.

Step 5 - as you start sewing keep a hold of the elastic and thread and do a forward and back lock in stitch at the start of your sewing. Then continue on with your first line of stitching. Do another lock in stitch to finish off your first line of sewing. Do not cut your threads with the automatic thread cutter if your machine has this feature. Cut your threads using scissors, snips or the blade at the side of your machine.

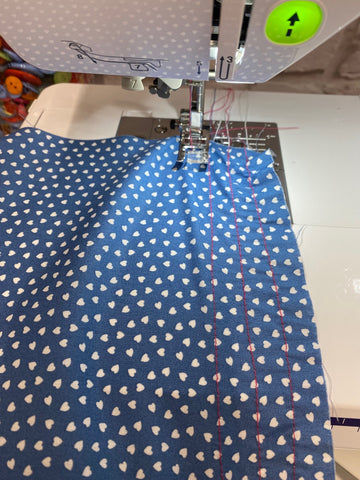
Step 6 - repeat with more rows of stitching using the same seam allowance between each row as you go. We are using the edge of the foot lined up with the previous row of stitching as a guide. As you repeat the process, make sure to keep your fabric flat as you sew the following rows (as shown in the second picture below).

Step 7 - keep on repeating the rows of stitching until you have your desired amount.
Step 8 - Last but not least, run a steaming iron lighty over your shirring. The steam will pull in the elastic stitching and complete your shirring!

Tah Dah! You have now completed your shirring. Hope you get to use this technique with different dressmaking projects in the future.
Fantastic tutorial, finally had a go with great results.
This is very helpful, I have tried shirring so many time , it’s hit and miss Thanks I will follow your instructions.